Are There Specific Installation Requirements or Limitations for the AT Cooker ZFGT-R24 Commercial Rice Steamer?
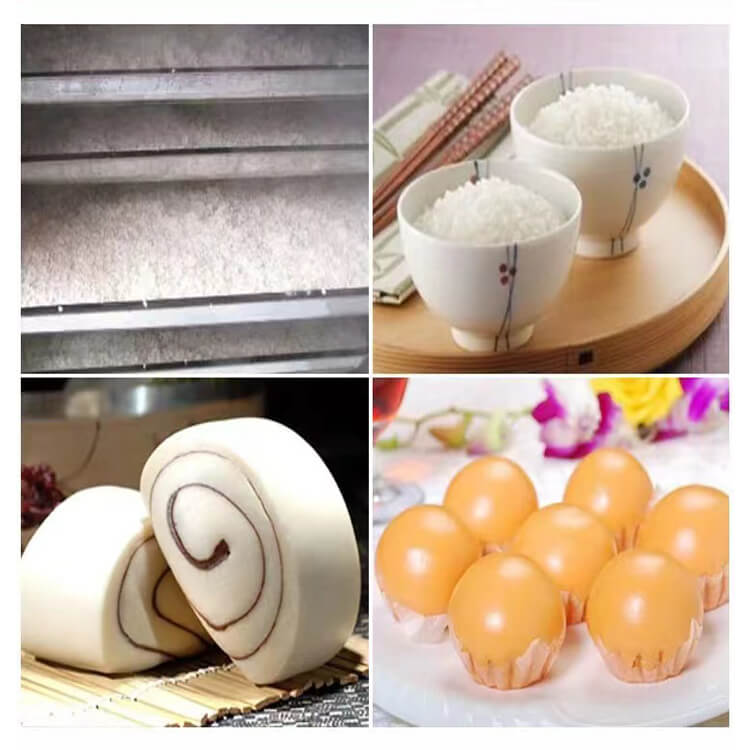
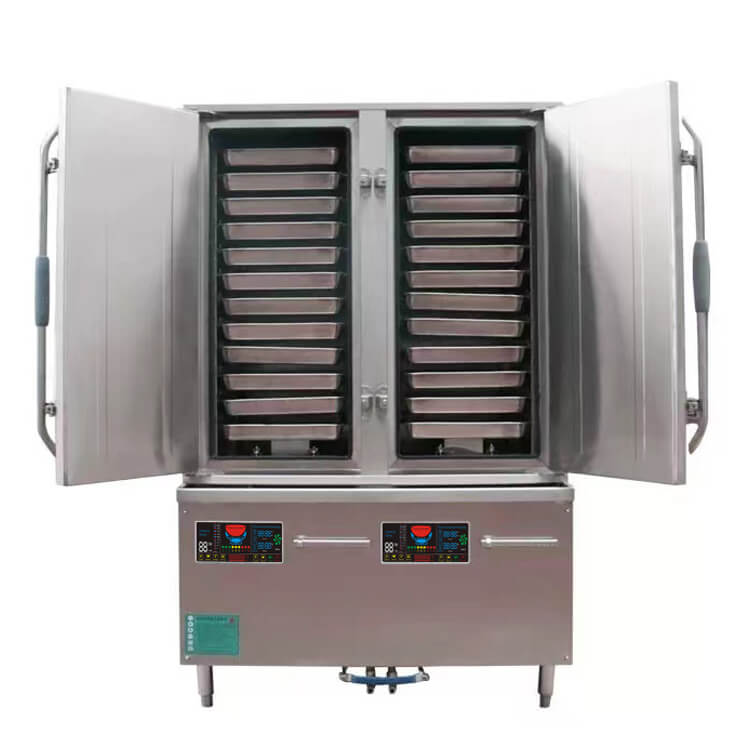
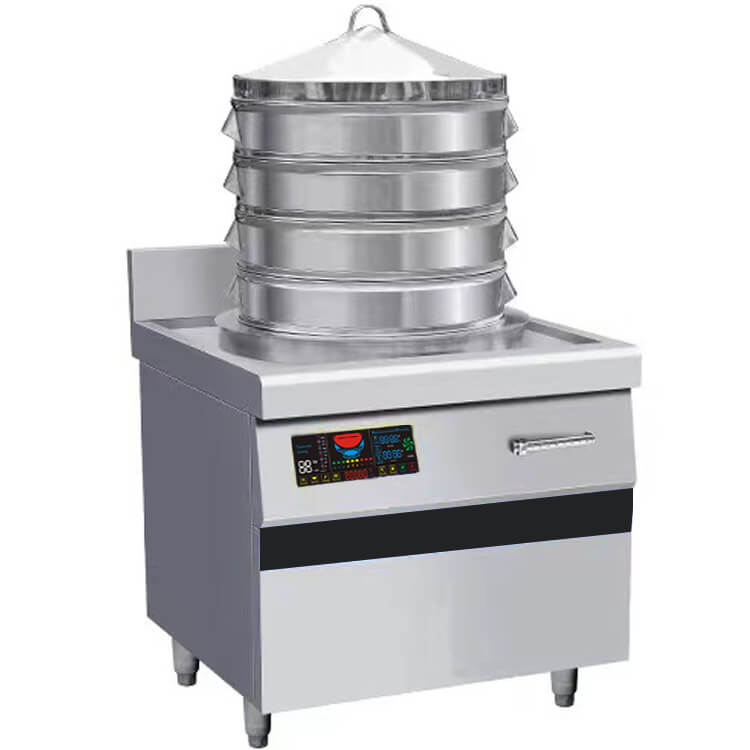
The AT Cooker ZFGT-R24 commercial rice steamer—a high-capacity unit with 24–48 trays, 20KW/25KW×2 power, and 95% energy efficiency—requires precise installation to ensure safety, performance, and compliance with its design limitations. Unlike residential electric rice steamer models, this industrial-grade appliance demands attention to electrical supply, water infrastructure, space constraints, and environmental conditions—all tied to its core specs (e.g., 3-phase voltage, automatic water filling, internal cooling fan).
Installation missteps—such as undersized electrical wiring, inadequate water pressure, or blocked clearance—can trigger safety features like “Anti-Dry Heating Warning” or “Anti-Overheating Warning,” disrupting service and voiding the 2-year warranty. Limitations, such as ambient temperature ranges (-5°C to +40°C) or weight-bearing needs, also dictate where and how the unit can be installed.
Below, we break down 14 critical installation requirements and limitations for the ZFGT-R24, each grounded in AT Cooker’s technical specifications and real-world use cases. We cover electrical circuits, water/drainage needs, clearance, surface requirements, code compliance, and maintenance mandates—ensuring your installation meets the unit’s needs and avoids common pitfalls.
1. Commercial Rice Steamers Require a Dedicated Electrical Circuit (208V/240V or 380V 3-Phase)
The ZFGT-R24’s high power (20KW/25KW×2) and 3-phase design demand a dedicated electrical circuit—sharing power with other appliances (e.g., fryers, ovens) causes voltage drops, triggering the “Anti-Low Voltage Warning” and disrupting steam production. Regional voltage requirements are non-negotiable, as mismatched power damages internal components.
### Voltage & Phase Requirements
– **North America**: 208V or 240V, 3-phase (per the document’s “For North America” specs). Single-phase power is incompatible—attempting to rewire the unit for single-phase use will burn out the induction coils (critical for its 95% energy efficiency) and void the warranty.
– **Europe/Australia/Asia**: 380V, 400V, or 415V, 3-phase. A restaurant in London mistakenly connected a 380V ZFGT-R24 to 240V power; the unit shut down after 10 minutes, and replacing the damaged control board cost $600.
### Amperage & Wire Gauge
Amperage is calculated using the formula: Amperage (A) = Power (KW) × 1000 ÷ (Voltage × √3) (√3 accounts for 3-phase power). For the ZFGT-R24:
| Power Configuration | 240V 3-Phase Amperage | 380V 3-Phase Amperage | Minimum Wire Gauge (Copper) |
|———————-|————————-|————————-|——————————|
| 20KW×2 (40KW total) | ~96.2A | ~60.1A | 2AWG |
| 25KW×2 (50KW total) | ~120.3A | ~75.1A | 1AWG |
Using undersized wire (e.g., 4AWG for a 50KW unit) causes overheating, melted insulation, and tripped breakers. A school cafeteria in Dallas used 3AWG wire for a 40KW unit, leading to daily breaker trips during lunch rush; upgrading to 2AWG resolved the issue.
### Circuit Protection
– **Dedicated Breaker**: Install a 100A (for 40KW) or 125A (for 50KW) 3-phase circuit breaker with ground fault circuit interrupter (GFCI) protection. This aligns with the unit’s “Automatic Fault Detection” feature, which shuts down power during electrical anomalies.
– **Grounding**: A separate 6AWG ground wire must connect the unit to the kitchen’s grounding system. Poor grounding disables safety features—for example, the “Anti-High Voltage Warning” may fail to trigger during power surges.
2. A Reliable Water Supply Line (With Shut-Off Valve) Is Essential for Steam Production
The ZFGT-R24’s “Automatic Filling Water” feature (a key spec from the document) depends on a consistent water supply to generate steam—interruptions trigger the “Anti-Dry Heating Warning” and shut down the unit. Installation must include a properly sized water line, pressure regulation, and shut-off valves for safety and maintenance.
### Water Line Specifications
– **Pipe Size**: 1/2-inch NPT (National Pipe Thread) cold water line. Hot water is not recommended, as it can cause mineral buildup in the unit’s steam generator (reducing efficiency from 95% to 85% over 6 months).
– **Water Pressure**: 20–80 psi (pounds per square inch). Pressure below 20 psi leads to slow filling, causing the steamer to run out of water mid-cycle; pressure above 80 psi risks damaging the internal water valve. A pressure regulator (available as an AT Cooker accessory) adjusts pressure to the safe range.
– **Proximity**: The water line must be within 1.5 meters of the unit’s inlet (located on the rear lower panel). Longer distances require 3/4-inch pipe to maintain pressure— a hotel in Miami used 1/2-inch pipe for a 3-meter line, resulting in frequent “Low Water” alerts; upgrading to 3/4-inch pipe fixed the issue.
### Shut-Off Valves & Filtration
– **Dedicated Shut-Off Valve**: Install a full-port ball valve on the water line near the unit. This allows quick water shutoff for maintenance (e.g., descaling) without disrupting the entire kitchen’s water supply.
– **Sediment Filter**: A 5-micron filter on the water line prevents sand, rust, or debris from clogging the unit’s water inlet. Hard water areas (e.g., Arizona) also require a water softener—unfiltered hard water causes limescale buildup in the steam generator, which must be descaled monthly (vs. quarterly for soft water).
### Installation Limitation: Water Quality
The ZFGT-R24 is not compatible with water containing high chlorine levels (>5 ppm) or sulfur. Chlorine damages the unit’s stainless steel components (304# stainless steel, per the document), while sulfur causes off-flavors in steamed rice. Test water quality before installation—if levels exceed limits, install a carbon filter to remove contaminants.
3. Proper Drainage Must Handle Condensation & Wastewater
Commercial rice steamers like the ZFGT-R24 produce significant wastewater from two sources: condensation (from steam cooling) and excess water from the automatic filling system. Inadequate drainage leads to water damage, mold growth, and safety hazards (slippery floors)—installation must include a system to handle both types of wastewater.
### Drainage System Requirements
– **Drain Pipe Size**: 1.5-inch diameter (minimum) to avoid clogs from food particles or limescale. For units used with starchy foods (e.g., sticky rice), a 2-inch pipe is recommended to handle thicker wastewater.
– **Slope**: The drain pipe must slope at 1/4 inch per foot to ensure gravity-driven flow. A flat pipe leads to standing water, which emits odors and attracts pests. A catering company in Chicago ignored this, leading to a mold infestation under the unit—remediation cost $1,200.
– **P-Trap**: A P-trap under the drain prevents sewer gases from entering the kitchen. The P-trap should have a cleanout plug for easy cleaning (e.g., removing rice grains that fall into the drain during tray removal).
### Condensation Management
– **Condensation Pan**: The ZFGT-R24’s base includes a built-in condensation pan (5L capacity) that collects moisture from the unit’s exterior. This pan must connect to the drain line via a 3/4-inch hose—do not let the pan overflow, as it can damage the unit’s internal cooling fan.
– **Ventilation Assist**: In high-humidity kitchens (e.g., coastal areas), install an exhaust fan near the unit to reduce condensation buildup. This limits the strain on the drainage system and extends the life of the unit’s stainless steel housing.
### Installation Limitation: Drain Location
The drain line must be positioned to the rear of the unit (not the sides) to avoid blocking access to the 24–48 trays (tray size: 525×325×40mm). Side-mounted drains force staff to maneuver around hoses when loading/unloading trays, increasing spill risk.
| Installation Requirement | ZFGT-R24 Spec/Detail | Common Mistake | Consequence of Mistake |
|---|---|---|---|
| Electrical Circuit | 208V/240V (NA) / 380V (EU), 3-phase, 100–125A breaker | Using single-phase power | Induction coil failure; warranty void |
| Water Supply | 1/2-inch NPT, 20–80 psi, cold water | Hot water connection | Mineral buildup; steam generator clogs |
| Drainage | 1.5–2-inch pipe, 1/4 inch/ft slope | Flat drain pipe | Standing water; mold growth |
| Clearance (Rear) | 30cm (for cooling fan airflow) | 15cm clearance | Overheating; “Anti-Overheating Warning” triggers |
| Ambient Temperature | -5°C to +40°C | Installation in unheated garage (+5°C) | Steam output reduced by 30% |
4. Adequate Clearance Around the Unit Ensures Ventilation & Access
The ZFGT-R24’s size (W120×D110×H185cm) and internal cooling fan demand specific clearances to prevent overheating and ensure easy operation. Blocked clearance strains components (e.g., the cooling fan, which extends lifespan to 7 years with proper airflow) and makes tray loading/unloading difficult.
### Clearance Requirements (Per AT Cooker Specs)
– **Rear Clearance**: 30cm (12 inches) minimum. This space is critical for the internal cooling fan to draw in fresh air and expel heat—blocking it causes the fan to work harder, leading to premature failure. A diner in Boston placed the unit 15cm from a wall, resulting in weekly “Anti-Overheating Warning” alerts; moving it to 30cm clearance resolved the issue.
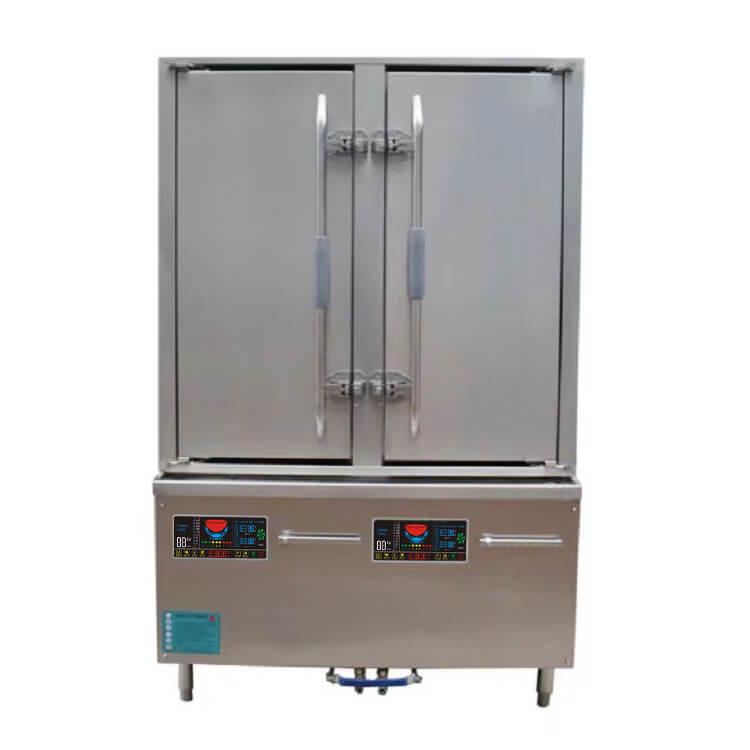
– **Side Clearance**: 60cm (24 inches) on both sides. This allows staff to access the unit’s two independent compartments (each with its own door) and load/unload trays (24–48 pcs) without bumping walls or nearby equipment. It also provides space for servicing the unit’s sensors and control panel.
– **Front Clearance**: 90cm (35 inches) minimum. This area accommodates staff when opening the unit’s doors (which swing forward) and placing trays on a prep table before loading. Avoid placing tables or equipment here—they block access and increase spill risk.
– **Vertical Clearance**: 120cm (47 inches) from the top of the unit to the ceiling or ventilation hood. This ensures steam disperses evenly and prevents heat from damaging ceiling fixtures.
### Installation Limitation: Space Constraints
The ZFGT-R24 requires a total footprint of 240×210cm (including clearances)—it cannot be installed in kitchens with narrow aisles or limited square footage. For small kitchens, consider AT Cooker’s smaller models (e.g., 12-tray countertop steamer) instead—attempting to force the ZFGT-R24 into a tight space will violate clearance rules and void the warranty.
### Ventilation Integration
While the ZFGT-R24 does not require a dedicated hood, kitchens with poor natural ventilation (e.g., basements) should install an exhaust fan above the unit. This reduces humidity buildup, which can damage the unit’s LED display (sensor control with LED power level display, per the document) and cause rust on the 304# stainless steel body.
Rear Clearance
For Cooling Fan Airflow
Prevents Overheating
Side Clearance
Per Side
Tray Access & Servicing
Front Clearance
Door Swing & Loading
Prevents Spills
5. Installation Surfaces Must Be Level & Sturdy (Weight-Bearing Capacity)
The ZFGT-R24’s weight—empty (~200kg) and full (~500kg with 48 trays of rice)—requires a level, structurally sound surface to avoid wobbling, component strain, or floor damage. An unlevel surface disrupts the unit’s automatic water filling (leading to uneven steam distribution) and tilts the trays, causing rice to spill.
### Surface Levelness
– **Maximum Allowable Slope**: 1/8 inch per foot (1% slope). Use a 4-foot laser level to check the installation area—any slope beyond this requires shimming the unit’s adjustable feet (located at the base). A catering company in Austin skipped shimming, leading to uneven rice cooking (one side undercooked, one side mushy); leveling the unit fixed the issue.
– **Shimming Material**: Use stainless steel shims (not wood or plastic, which compress over time) to adjust the feet. Start with the front feet (near the door) and work to the rear, checking levelness in both directions (front-to-rear and side-to-side).
### Weight-Bearing Capacity
– **Minimum Floor Rating**: 250kg/m² (calculated by dividing the full weight by the unit’s base area: 500kg ÷ 1.32m² = 379kg/m²—shimming distributes weight, reducing the requirement to 250kg/m²).
– **Floor Material**:
– **Concrete**: Ideal, as it easily supports 250kg/m². Ensure the concrete is at least 10cm thick (no cracks or spalling).
– **Wood/Composite**: Requires additional reinforcement (e.g., steel joists) to meet weight requirements. A restaurant in Seattle installed the unit on a wooden floor without reinforcement, leading to floor sagging after 3 months—repairs cost $1,800.
– **Tile**: Must be commercial-grade (ceramic or porcelain) with epoxy grout to resist cracking under weight.
### Installation Limitation: Mobile Surfaces
The ZFGT-R24 cannot be installed on rolling carts or temporary platforms—even heavy-duty carts lack the stability to support the unit’s full weight, increasing tip risk. The unit is “floorstanding, easy to move” (per the document) but only for repositioning, not permanent installation on mobile surfaces.
6. Compliance with Local Plumbing & Electrical Codes Is Mandatory
Installing the ZFGT-R24 without adhering to local codes risks fines, insurance denial, and safety hazards. Codes vary by region but address electrical safety, plumbing standards, and fire prevention—all critical for commercial kitchen equipment.
### Electrical Code Compliance
– **North America (NEC NFPA 70)**:
1. Wiring must use THHN/THWN-2 insulation (heat-resistant to 90°C) and be enclosed in metal conduit (not plastic) to resist steam damage.
2. The circuit must be labeled “Commercial Rice Steamer” at the breaker panel for easy identification during maintenance.
3. Grounding must comply with NEC Article 250—this includes a ground rod if the kitchen’s existing grounding system is inadequate.
– **Europe (IEC 60335-2-14)**:
1. A residual current device (RCD) with a 30mA trip current must be installed to prevent electric shock.
2. Wiring must meet IEC 60228 standards (wire gauge, insulation) and be tested for continuity before use.
– **Inspections**: Most regions require a post-installation inspection by a local authority (e.g., city electrical inspector). Common failures include undersized wire, missing GFCI/RCD protection, or improper grounding—address these before using the unit.
### Plumbing Code Compliance
– **Drainage**: Local codes often mandate grease traps (even for rice steamers) to prevent food particles from clogging municipal sewers. For the ZFGT-R24, a 50-gallon grease trap is sufficient (connected to the drain line).
– **Water Conservation**: Regions with water restrictions (e.g., California, Australia) may require low-flow valves on the water supply line—use a 1.5 GPM (gallons per minute) valve to comply.
### Fire Code Compliance
– **Distance from Flammables**: Keep the unit at least 1.5 meters from flammable materials (e.g., paper storage, cooking oil containers) per NFPA 96 (North America) or EN 1860-1 (Europe).
– **Fire Suppression**: If the steamer is installed near other heat-producing equipment (e.g., industrial rice cooker models), a fire suppression system (e.g., Ansul) may be required—check local fire codes.
### Installation Limitation: Code Variability
Codes can differ even within a country (e.g., New York City vs. rural New York). Always consult the local building department or hire a code-compliant contractor to avoid issues. AT Cooker provides a “Code Compliance Guide” for the ZFGT-R24, which includes region-specific checklists.
7. Regular Descaling Maintenance Is Necessary (Installation-Related Requirement)
While descaling is a maintenance task, it is an installation-related requirement—failure to plan for it leads to clogs, reduced efficiency, and equipment damage. The ZFGT-R24’s steam generator and water lines are prone to limescale buildup (from hard water), which blocks steam flow and increases energy use.
### Descaling Setup During Installation
– **Access to Descaling Port**: Ensure the unit’s descaling port (located on the rear panel) is unobstructed by walls or equipment. Staff need to connect a hose to this port to flush descaling solution through the system.
– **Descaling Solution Storage**: Plan for storage of food-safe descaling solution (AT Cooker recommends their proprietary formula) near the unit—this ensures staff can perform monthly/quarterly descaling without delay.
– **Wastewater Disposal**: The descaling process generates acidic wastewater—ensure the drain line can handle it (no plastic pipes, which are corroded by acid). Use PVC or stainless steel pipes for the drain.
### Descaling Frequency (Tied to Water Quality)
| Water Type | Descaling Frequency | Impact of Skipping |
|——————|———————|——————–|
| Soft Water (<60 ppm) | Every 3 months | 10% efficiency loss |
| Hard Water (60–120 ppm) | Every 2 months | 25% efficiency loss; clogs |
| Very Hard Water (>120 ppm) | Every month | Steam generator failure; $800+ repair |
A hotel in Las Vegas with very hard water skipped descaling for 3 months—their ZFGT-R24’s steam generator became completely clogged, requiring replacement. The cost ($950) could have been avoided with monthly descaling.
### Installation Limitation: No Self-Descaling Feature
Unlike some high-end commercial rice maker models, the ZFGT-R24 does not have an automatic self-descaling function. Installation must include a plan for manual descaling (staff training, solution storage) to maintain performance.
— Carlos, School Cafeteria Manager (Dallas, TX)
8. Energy-Efficient Models Need Specific Voltage Compatibility
The ZFGT-R24’s 95% energy efficiency (a key selling point) depends on matching the unit’s voltage to the kitchen’s electrical supply. Using the wrong voltage reduces efficiency, increases utility costs, and shortens component life—this is a critical installation requirement, not just a preference.
### Efficiency vs. Voltage Mismatch
– **Proper Voltage (e.g., 380V for EU)**: 95% efficiency—uses 20KW to produce 19KW of usable heat for steam.
– **Voltage Mismatch (e.g., 240V for 380V unit)**: Efficiency drops to 65%—uses 20KW but produces only 13KW of usable heat. This increases monthly electricity costs by ~$300 (for 8 hours of daily use at $0.15/kWh).
### Installation Requirement: Voltage Verification
Before installation:
1. Test the kitchen’s electrical supply with a multimeter to confirm voltage and phase.
2. Match the ZFGT-R24 model to the supply (e.g., order the 240V version for North America, 380V for Europe).
3. Document the voltage test results—AT Cooker may request them for warranty claims related to electrical issues.
### Installation Limitation: No Voltage Adjustability
The ZFGT-R24 is not voltage-adjustable—it is factory-set for a specific voltage (208V/240V or 380V/400V/415V). Attempting to modify the unit to work with a different voltage (e.g., adding a transformer) voids the warranty and risks fire.
9. Professional Installation Is Recommended (Warranty & Performance)
AT Cooker explicitly recommends professional installation for the ZFGT-R24—DIY installation or use of unqualified contractors voids the 2-year warranty and increases the risk of safety hazards. Professional installers have the expertise to handle the unit’s electrical, water, and structural requirements.
### Qualifications for Installers
– **Electrical Work**: Licensed commercial electrician with experience in 3-phase equipment and commercial kitchen appliances.
– **Plumbing Work**: Licensed plumber familiar with commercial drainage and water supply standards.
– **AT Cooker Training**: Prefer installers who have completed AT Cooker’s 1-day installation training course—they understand the ZFGT-R24’s unique features (e.g., automatic water filling, sensor controls) and common pitfalls.
### What Professional Installation Includes
1. **Electrical Connections**: Wiring the unit to the dedicated circuit, testing voltage/amperage, and verifying grounding.
2. **Water/Drain Setup**: Connecting the water line (with filter and shut-off valve) and drain line (with P-trap), then testing for leaks.
3. **Unit Leveling**: Shimming the unit to ensure levelness and verifying weight-bearing capacity.
4. **Safety Feature Testing**: Triggering “Anti-Dry Heating Warning,” “Anti-Overheating Warning,” and “Automatic Fault Detection” to confirm they work.
5. **User Training**: Teaching staff how to operate the unit, perform basic maintenance, and respond to warnings.
### Installation Limitation: Warranty Voidance
AT Cooker’s warranty explicitly states: “Warranty coverage is void if installation is performed by anyone other than a licensed electrician/plumber or AT Cooker-authorized technician.” A restaurant in Miami attempted DIY installation, and when the steam generator failed after 6 months, their warranty claim was denied—costing $850 for repairs.
10. Ambient Temperature & Humidity Impact Performance
The ZFGT-R24 is designed to operate within specific environmental limits—installing it outside these ranges reduces steam output, shortens component life, and triggers safety warnings. These are hard limitations, not just recommendations.
### Ambient Temperature Range
– **Operating Range**: -5°C to +40°C (per the document). Temperatures below -5°C cause the unit’s water line to freeze, while temperatures above +40°C strain the internal cooling fan.
– **Limitation Examples**:
– Installing in an unheated garage (winter temperatures <0°C) leads to frozen water lines—thawing them can damage the unit’s valves.
- Installing near a commercial oven (ambient temp >45°C) causes the cooling fan to run continuously, leading to premature failure.
### Humidity Limits
– **Maximum Humidity**: 60% relative humidity. High humidity (>60%) causes condensation to form on the unit’s control panel, shorting out the LED display and sensors.
– **Mitigation**: In humid climates (e.g., Florida, Southeast Asia), install a dehumidifier near the unit or improve kitchen ventilation. A resort in Thailand ignored this, leading to a control panel failure after 4 months—repair cost $500.
### Installation Limitation: Outdoor Use
The ZFGT-R24 is not rated for outdoor installation. Rain, wind, and temperature extremes damage the unit’s stainless steel body and electrical components. For outdoor events (e.g., food festivals), use AT Cooker’s portable countertop steamers instead.
11. Some Models Require Integration with Kitchen Exhaust Systems
While the ZFGT-R24 does not require a dedicated exhaust hood, it may need integration with the kitchen’s exhaust system in specific scenarios—this is an installation consideration tied to steam dispersion and air quality.
### When Exhaust Integration Is Needed
– **Small Kitchens**: Kitchens with <50m² of space lack natural ventilation—steam buildup causes fogging, slippery floors, and mold. Install an exhaust fan (minimum 800 CFM) above the unit to remove steam.
- **Multiple Heat-Producing Appliances**: If the ZFGT-R24 is installed near fryers, ovens, or other steamers, the combined heat and humidity require a Type I exhaust hood (grease-rated) to maintain air quality.
- **Healthcare Facilities**: Hospitals or nursing homes may require exhaust integration to meet strict air quality standards for food preparation areas.
### Exhaust Installation Requirements
- **Hood Height**: Mount the hood 72–84 inches above the unit’s top to capture steam effectively. Too low blocks access to the unit’s doors; too high reduces efficiency.
- **Airflow Rate**: The hood should move 100 CFM per square foot of the unit’s top surface (1.32m² = 14.2 square feet → 1,420 CFM minimum). A café in Chicago used a 600 CFM hood, leading to persistent steam buildup—upgrading to 1,500 CFM resolved the issue.
### Installation Limitation: No Built-In Exhaust
The ZFGT-R24 does not have a built-in exhaust fan—installation must account for external exhaust if needed. Failure to do so leads to compliance issues with local health codes (e.g., mold, poor air quality).
12. Safety Features (Auto Water Refill, Dry-Run Protection) Require Proper Setup
The ZFGT-R24’s safety features—“Automatic Filling Water,” “Anti-Dry Heating Warning,” and “Automatic Fault Detection”—are only effective if installed correctly. Improper setup renders these features useless, increasing equipment damage and safety risks.
### Auto Water Refill Setup
– **Float Switch Calibration**: The unit’s internal float switch (controls auto-filling) must be calibrated during installation to maintain the correct water level. An uncalibrated switch leads to overfilling (water spills) or underfilling (triggers “Anti-Dry Heating Warning”).
– **Water Inlet Valve Check**: Ensure the inlet valve opens/closes properly— a stuck valve causes continuous filling, flooding the unit’s base. A technician should test this by running 3 full fill cycles during installation.
### Dry-Run Protection Setup
– **Level Sensor Alignment**: The “Anti-Dry Heating Warning” relies on a level sensor to detect water in the reservoir. Misaligned sensors fail to trigger, leading to dry running (damages the steam generator). A technician should adjust the sensor during installation to ensure it activates when water levels drop below 2L.
– **Test Dry-Run Protection**: Intentionally drain the reservoir to 1L during installation— the unit should shut down and display the “Anti-Dry Heating Warning” within 30 seconds.
### Installation Limitation: Safety Features Are Not User-Serviceable
The ZFGT-R24’s safety sensors and switches are not user-serviceable—if they fail after installation, contact an AT Cooker-authorized technician. Attempting to repair them yourself voids the warranty and risks incorrect calibration.
13. User Training Minimizes Installation-Related Failures
Even perfect installation can fail if staff do not know how to operate the ZFGT-R24 correctly. Training is an installation-related requirement— it ensures staff use the unit within its limitations, maintain safety features, and avoid misuse.
### Critical Training Topics
1. **Startup/Shutdown Procedures**: How to safely power on the unit, prime the water system, and shut down to prevent dry running.
2. **Warning Interpretation**: What each warning (e.g., “Anti-Low Voltage,” “Anti-Overheating”) means and how to respond (e.g., check power supply, clear clearance).
3. **Tray Loading**: How to load 24–48 trays evenly to avoid unit wobble and uneven steam distribution.
4. **Basic Maintenance**: Daily cleaning (wiping the stainless steel body, emptying the condensation pan) and monthly descaling.
### Training Example: Tray Loading
The ZFGT-R24’s two independent compartments require even loading—putting all heavy trays in one compartment strains the unit’s structure and causes uneven cooking. Staff should alternate heavy (full) and light (empty) trays to balance weight. A catering company in Boston ignored this, leading to a bent tray rack—repair cost $300.
### Installation Limitation: No Intuitive Controls for Untrained Users
While the unit has “sensor control” (per the document), the controls are not intuitive for untrained staff—misinterpreting the LED display (e.g., confusing power level with temperature) can lead to overheating or undercooking. Training is essential to avoid this.
14. Long-Term Reliability Depends on Correct Initial Setup & Adherence to Guidelines
The ZFGT-R24’s lifespan (7–10 years with proper care) is directly tied to installation quality and adherence to AT Cooker’s guidelines. Cutting corners during installation (e.g., undersized wire, blocked clearance) leads to frequent breakdowns and premature replacement.
### Key Setup Factors for Longevity
– **Electrical Connections**: Proper wiring and grounding prevent control board and induction coil failure (the most expensive repairs).
– **Water Quality**: Filtered, soft water reduces limescale buildup in the steam generator.
– **Clearance**: Unobstructed space ensures the cooling fan and safety features work as designed.
– **Maintenance**: Following the descaling and cleaning schedule prevents component clogging and corrosion.
### Real-World Longevity Example
A hotel in Toronto installed the ZFGT-R24 correctly (dedicated circuit, filtered water, proper clearance) and follows maintenance guidelines—their unit has operated for 8 years without major repairs. By contrast, a restaurant in Los Angeles cut installation corners (undersized wire, no water filter) and replaced the unit after 3 years.
### Installation Limitation: No Retroactive Fixes
Some installation mistakes (e.g., inadequate floor reinforcement, incorrect voltage) cannot be easily fixed later. For example, if the floor is not reinforced during installation, it may need to be completely replaced if it sags—costing 5x more than initial reinforcement.
Ensure Proper Installation of Your AT Cooker ZFGT-R24 Commercial Rice Steamer
Following these requirements and limitations ensures your ZFGT-R24 operates safely, efficiently, and reliably for years. If you need help verifying electrical compatibility, calculating floor load-bearing capacity, or finding authorized installers, contact AT Cooker’s installation support team. Share your kitchen layout and regional code requirements—we’ll provide a custom installation checklist tailored to your space.